Overview
Importing hierarchies or invitations for the end customers to answer a survey is a core task regarding the usage of ResponseTek. At times, a file being imported is rejected, as you can notice by the Disposition Report, an automatic email sent by the system with the results of an import:
The imported file needs to be fixed. Otherwise, the hierarchy will not be updated or some customers will not be surveyed. This article will help you identify and fix the most common errors, so you can get invitations sent as soon as possible.
Workflow

(Click the image to enlarge)
Instructions
Get A Reference File
Most of the work involved in diagnosing why a file has been rejected requires a comparison with a file that has been successfully imported. Therefore, it is recommended to have this reference file at hand, which can be any file you have successfully imported recently.
Check The File Name Follows The Convention
The file name must follow the naming convention, otherwise, it will not be picked up for processing. Check that the name of the troubled file follows the same pattern as the reference file.
Rename The File To Follow The Convention
Since files are not picked up for processing if they do not follow the naming convention, it must be renamed. Use the reference file name as a guide to understand the expected name.
Check The Text Encoding
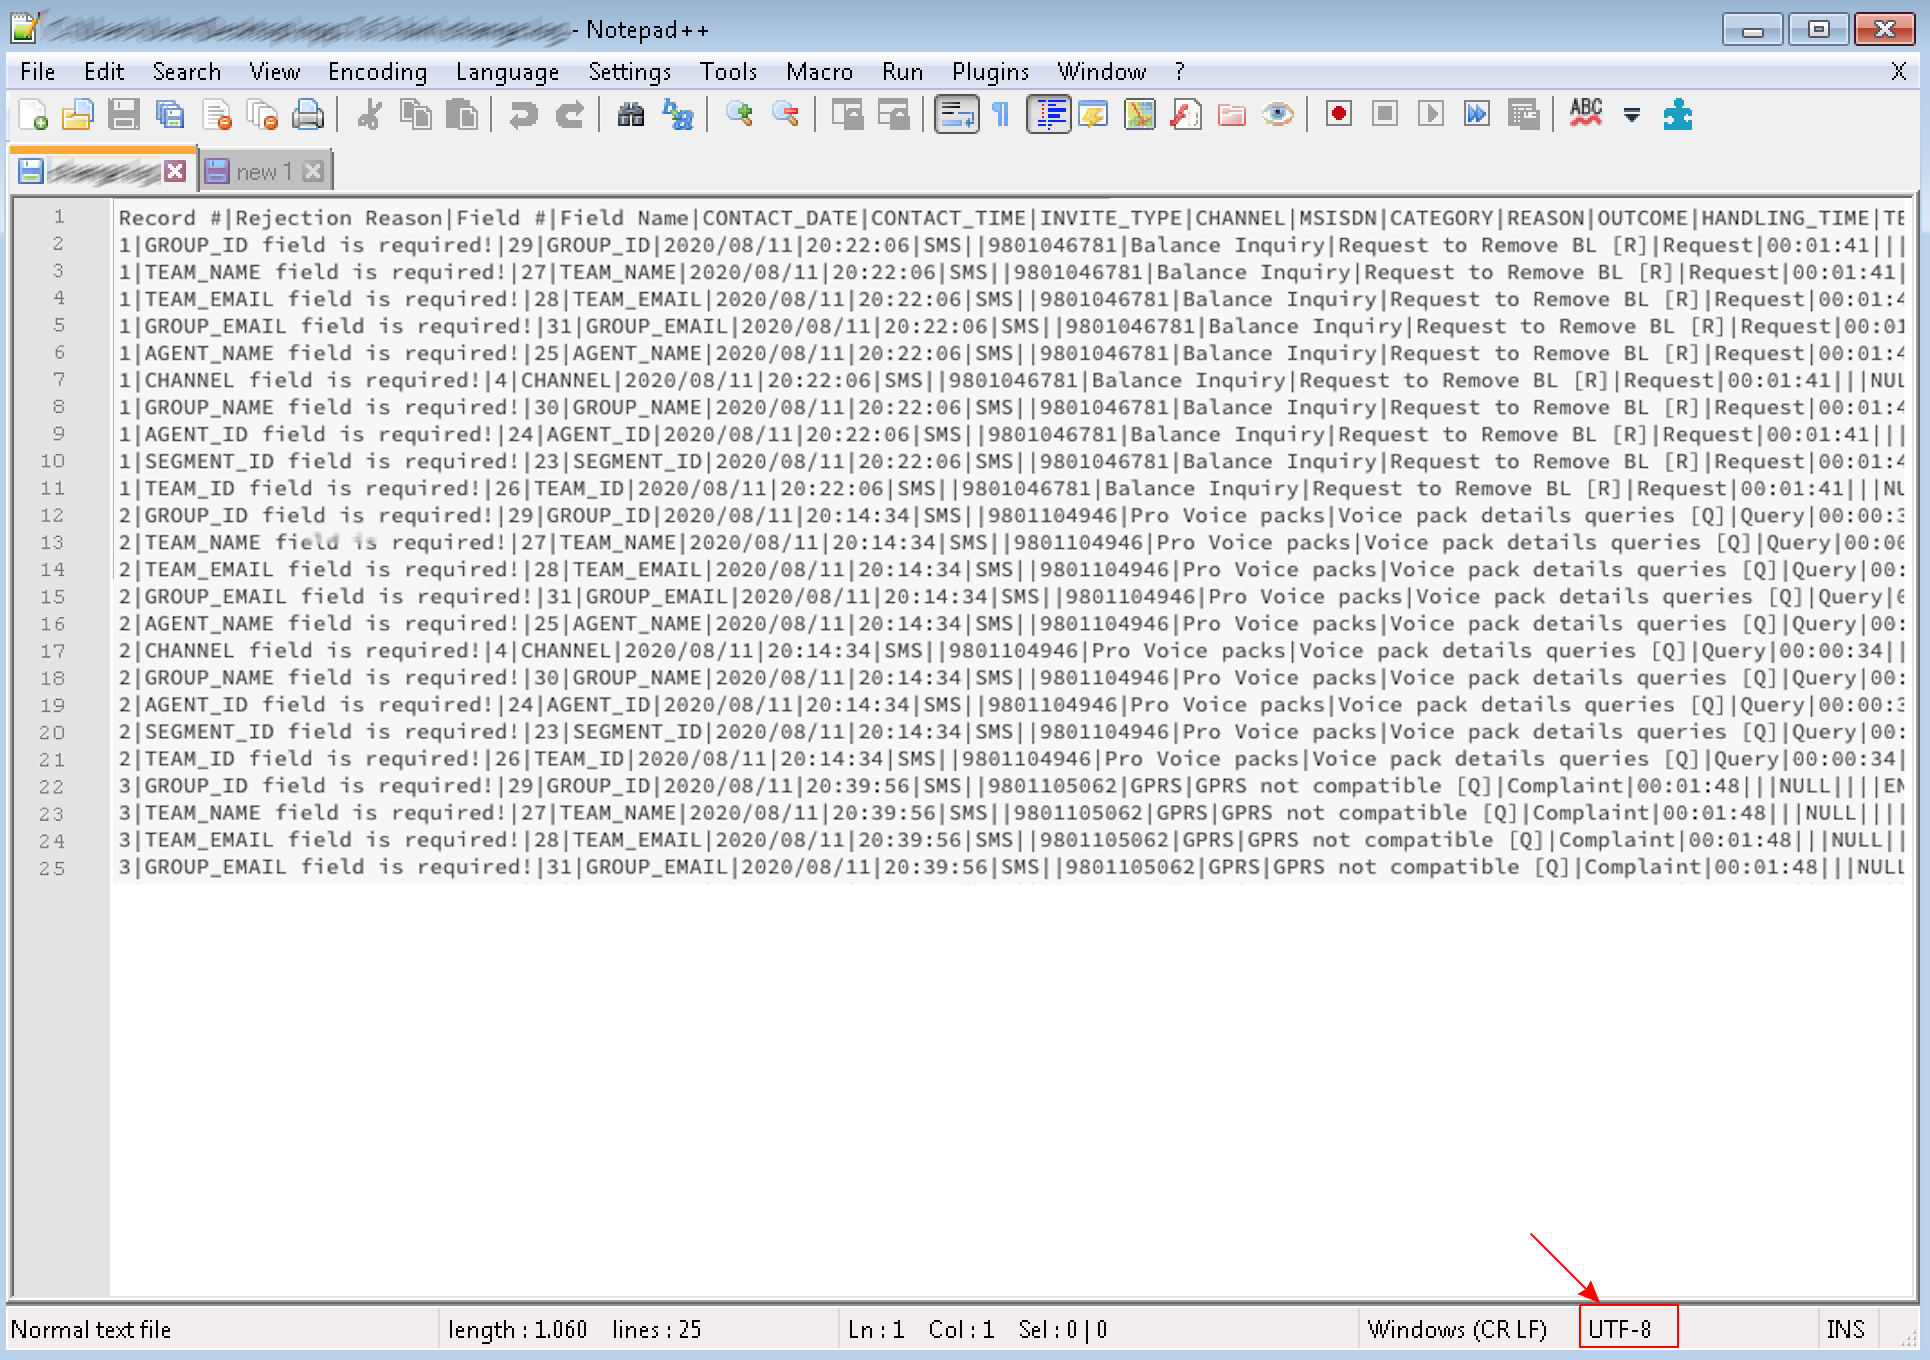
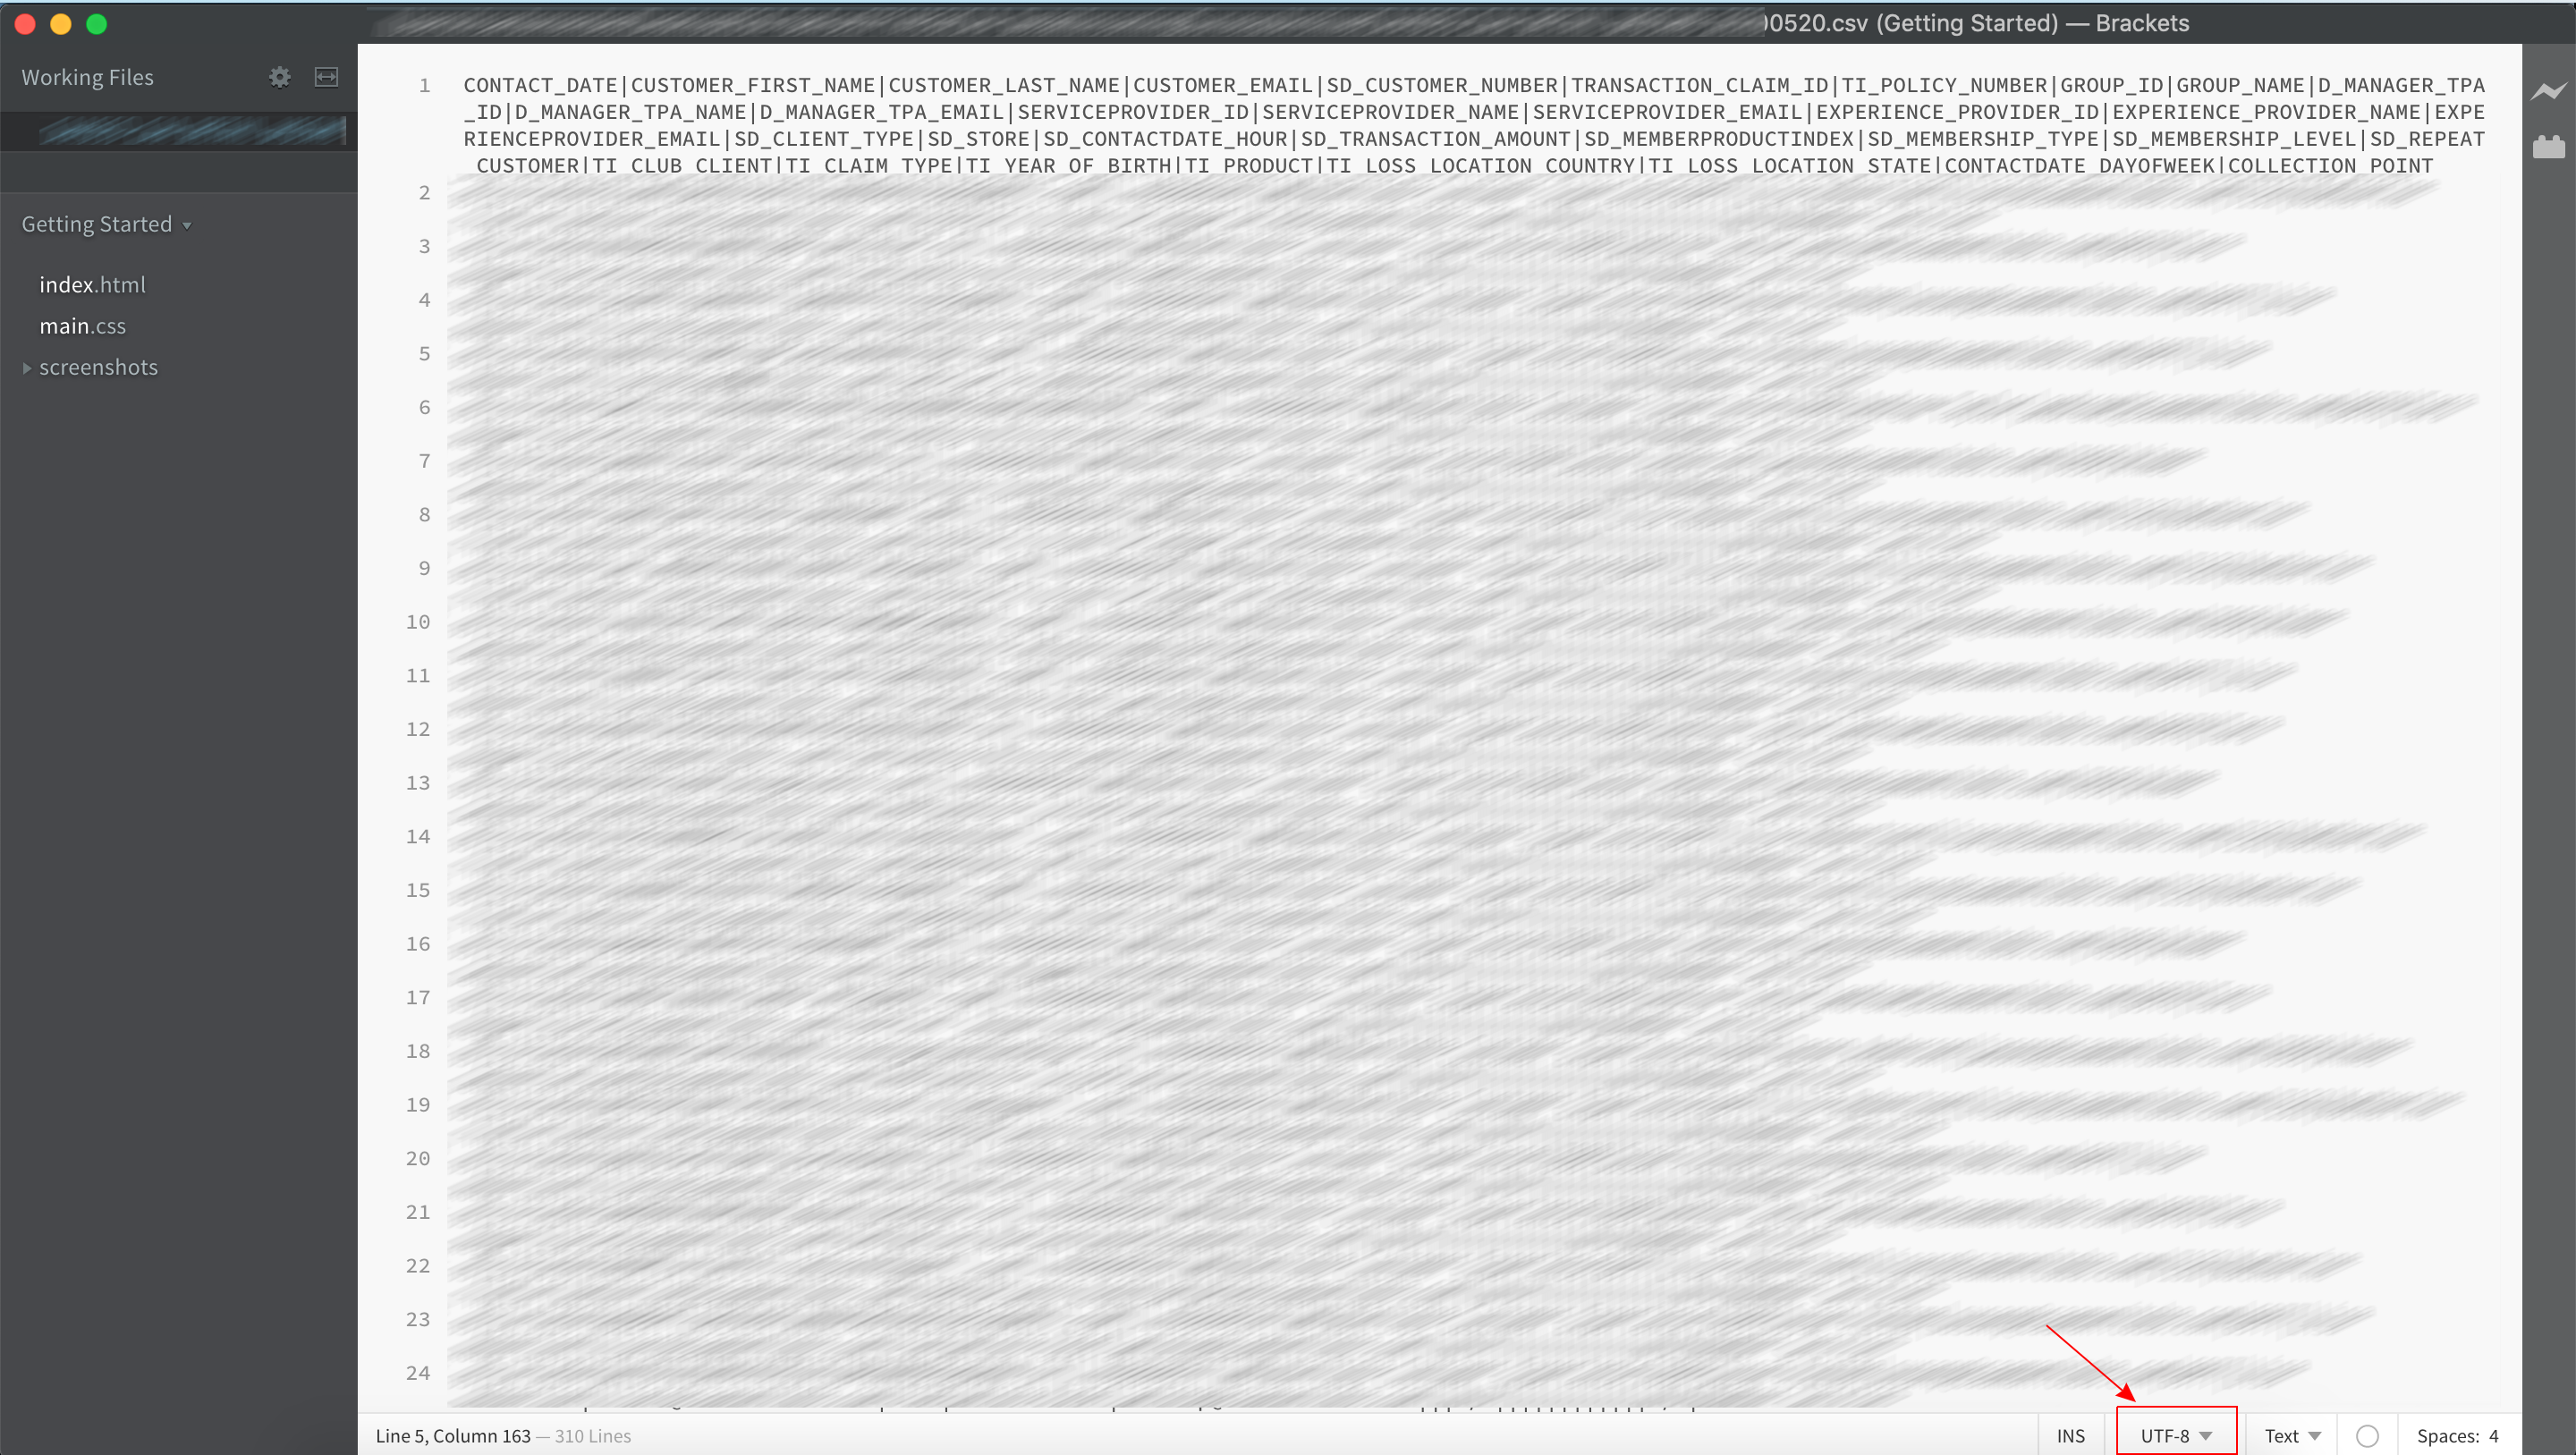
To validate the text encoding more easily, you must use a text editor app like Notepad++ for Windows or Brackets for Mac. Once you have them installed, follow these steps:
- Open the reference file.
- Take note of the file encoding it uses. Click to enlarge the images.
Windows Mac - Open the troubled file.
- Check if it uses the same encoding.
Windows Mac
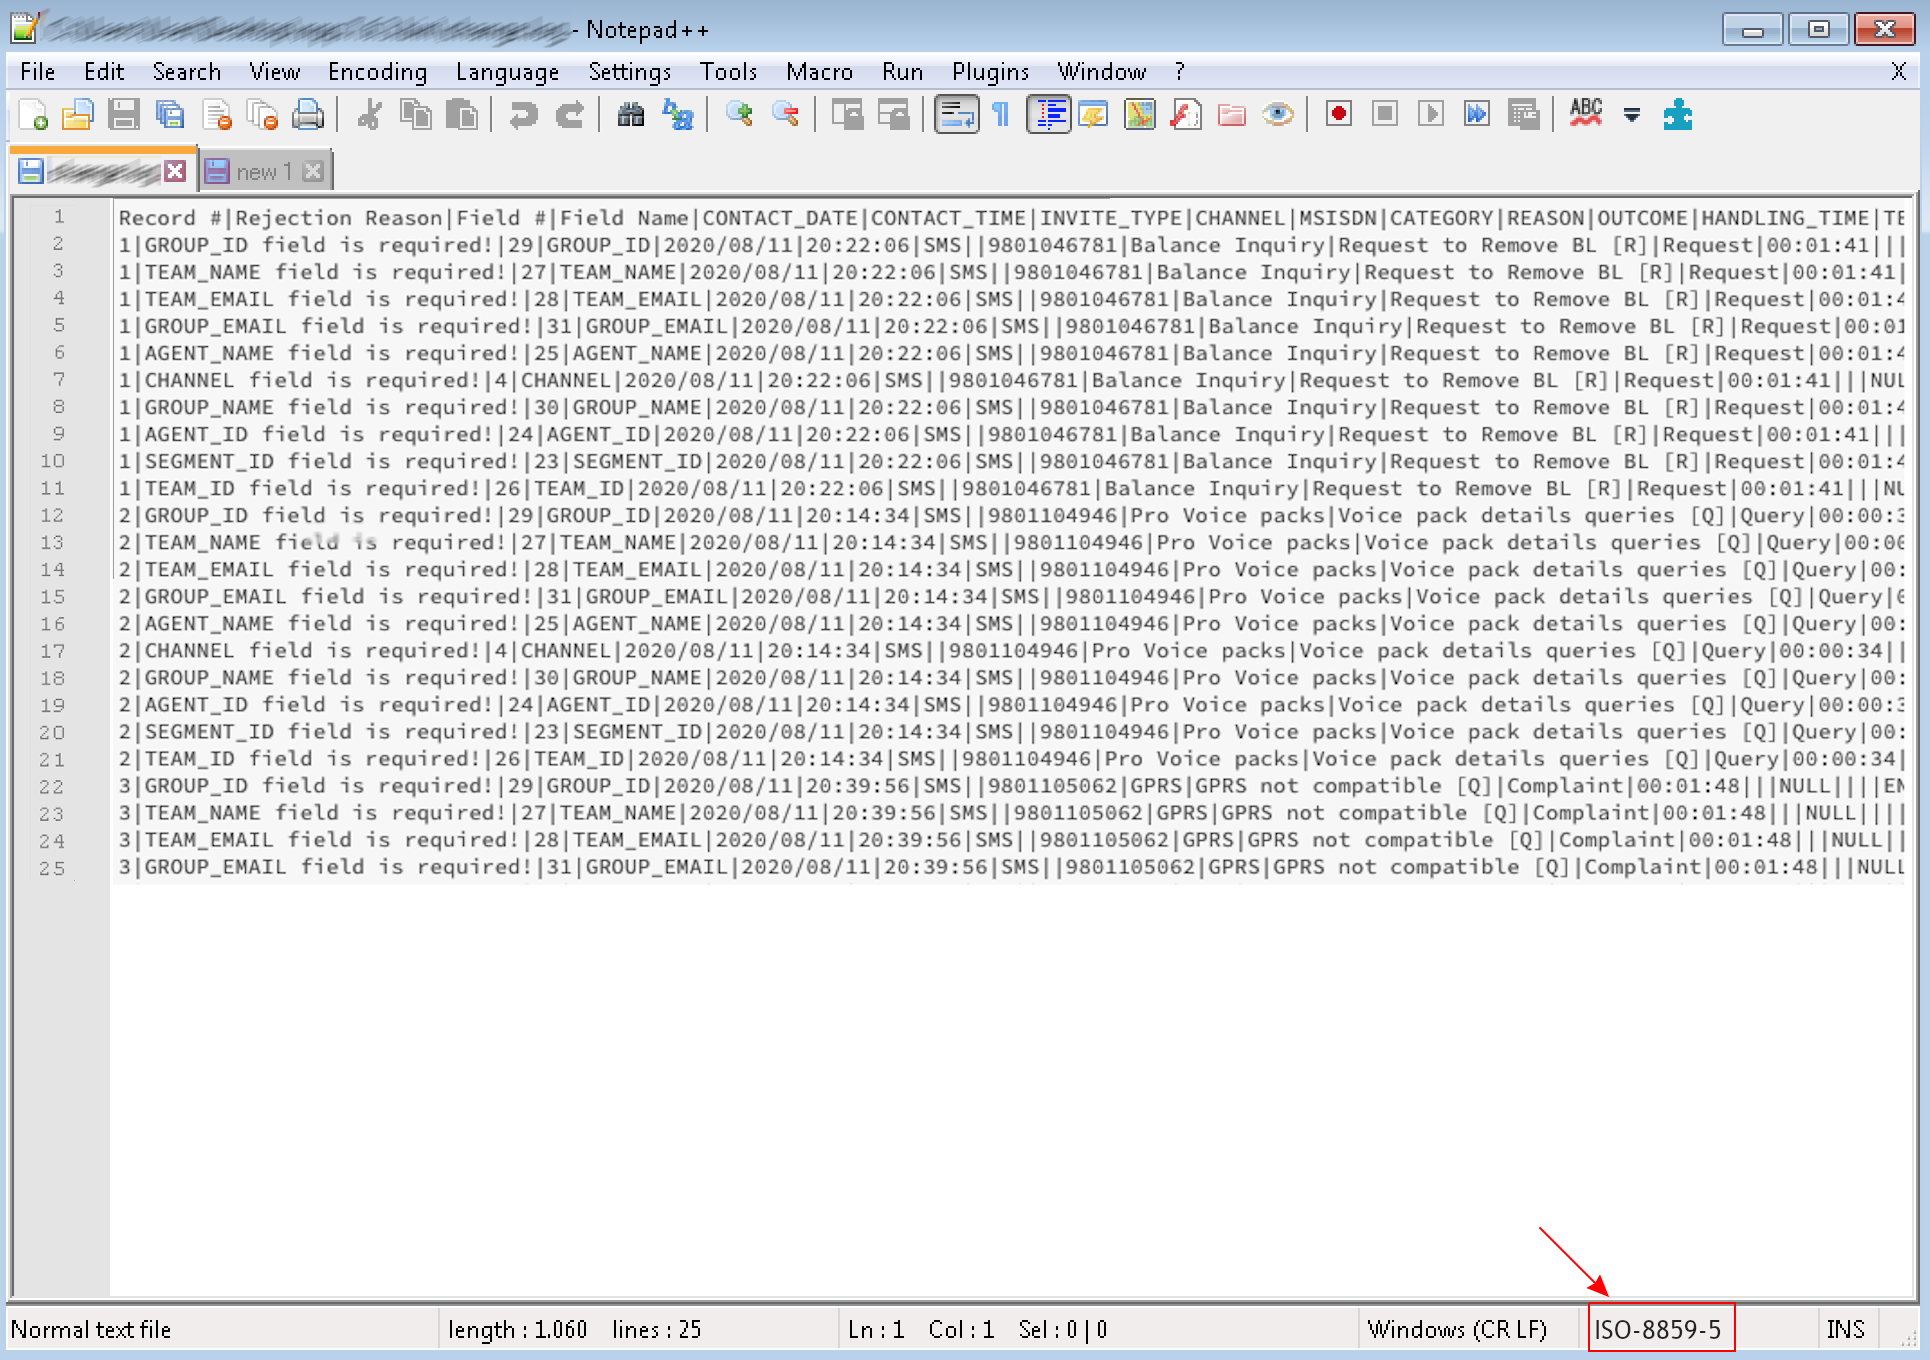

Fix The Text Encoding
Make the encoding of the rejected file match the one of the reference file. The recommended text editors can do that.
Check Garbage Characters
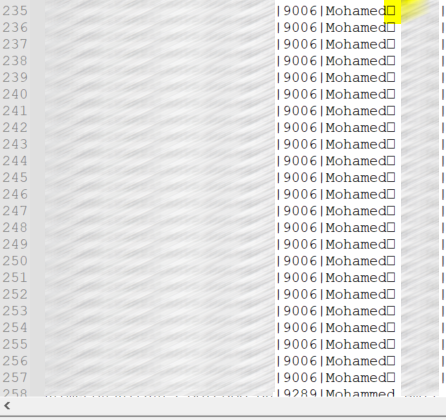
Using a text editor app like Notepad++ for Windows or Brackets for Mac, open the troubled file and look for invalid characters, usually represented as small squares:
Remove Garbage Characters
Copy one of the invalid characters and try to use the Find and Replace feature of the text editor to get rid of all at once. If that does not work, you will have to do that manually.
Check The Column Delimiter
The delimiter is the character used to separate columns in a text file. The most common delimiters are the pipe and the comma. In order to validate if the troubled file is using the correct delimiter, check what is the delimiter in the reference file.
| Reference file |  |
| Troubled file |  |
Invalid column delimiter
Replace the delimiter with the one used in the reference file.
Check If There Are Invalid Columns
When there are missing, out of order, or misspelled columns, the import process will fail. In order to validate if there is no column missing, do the following:
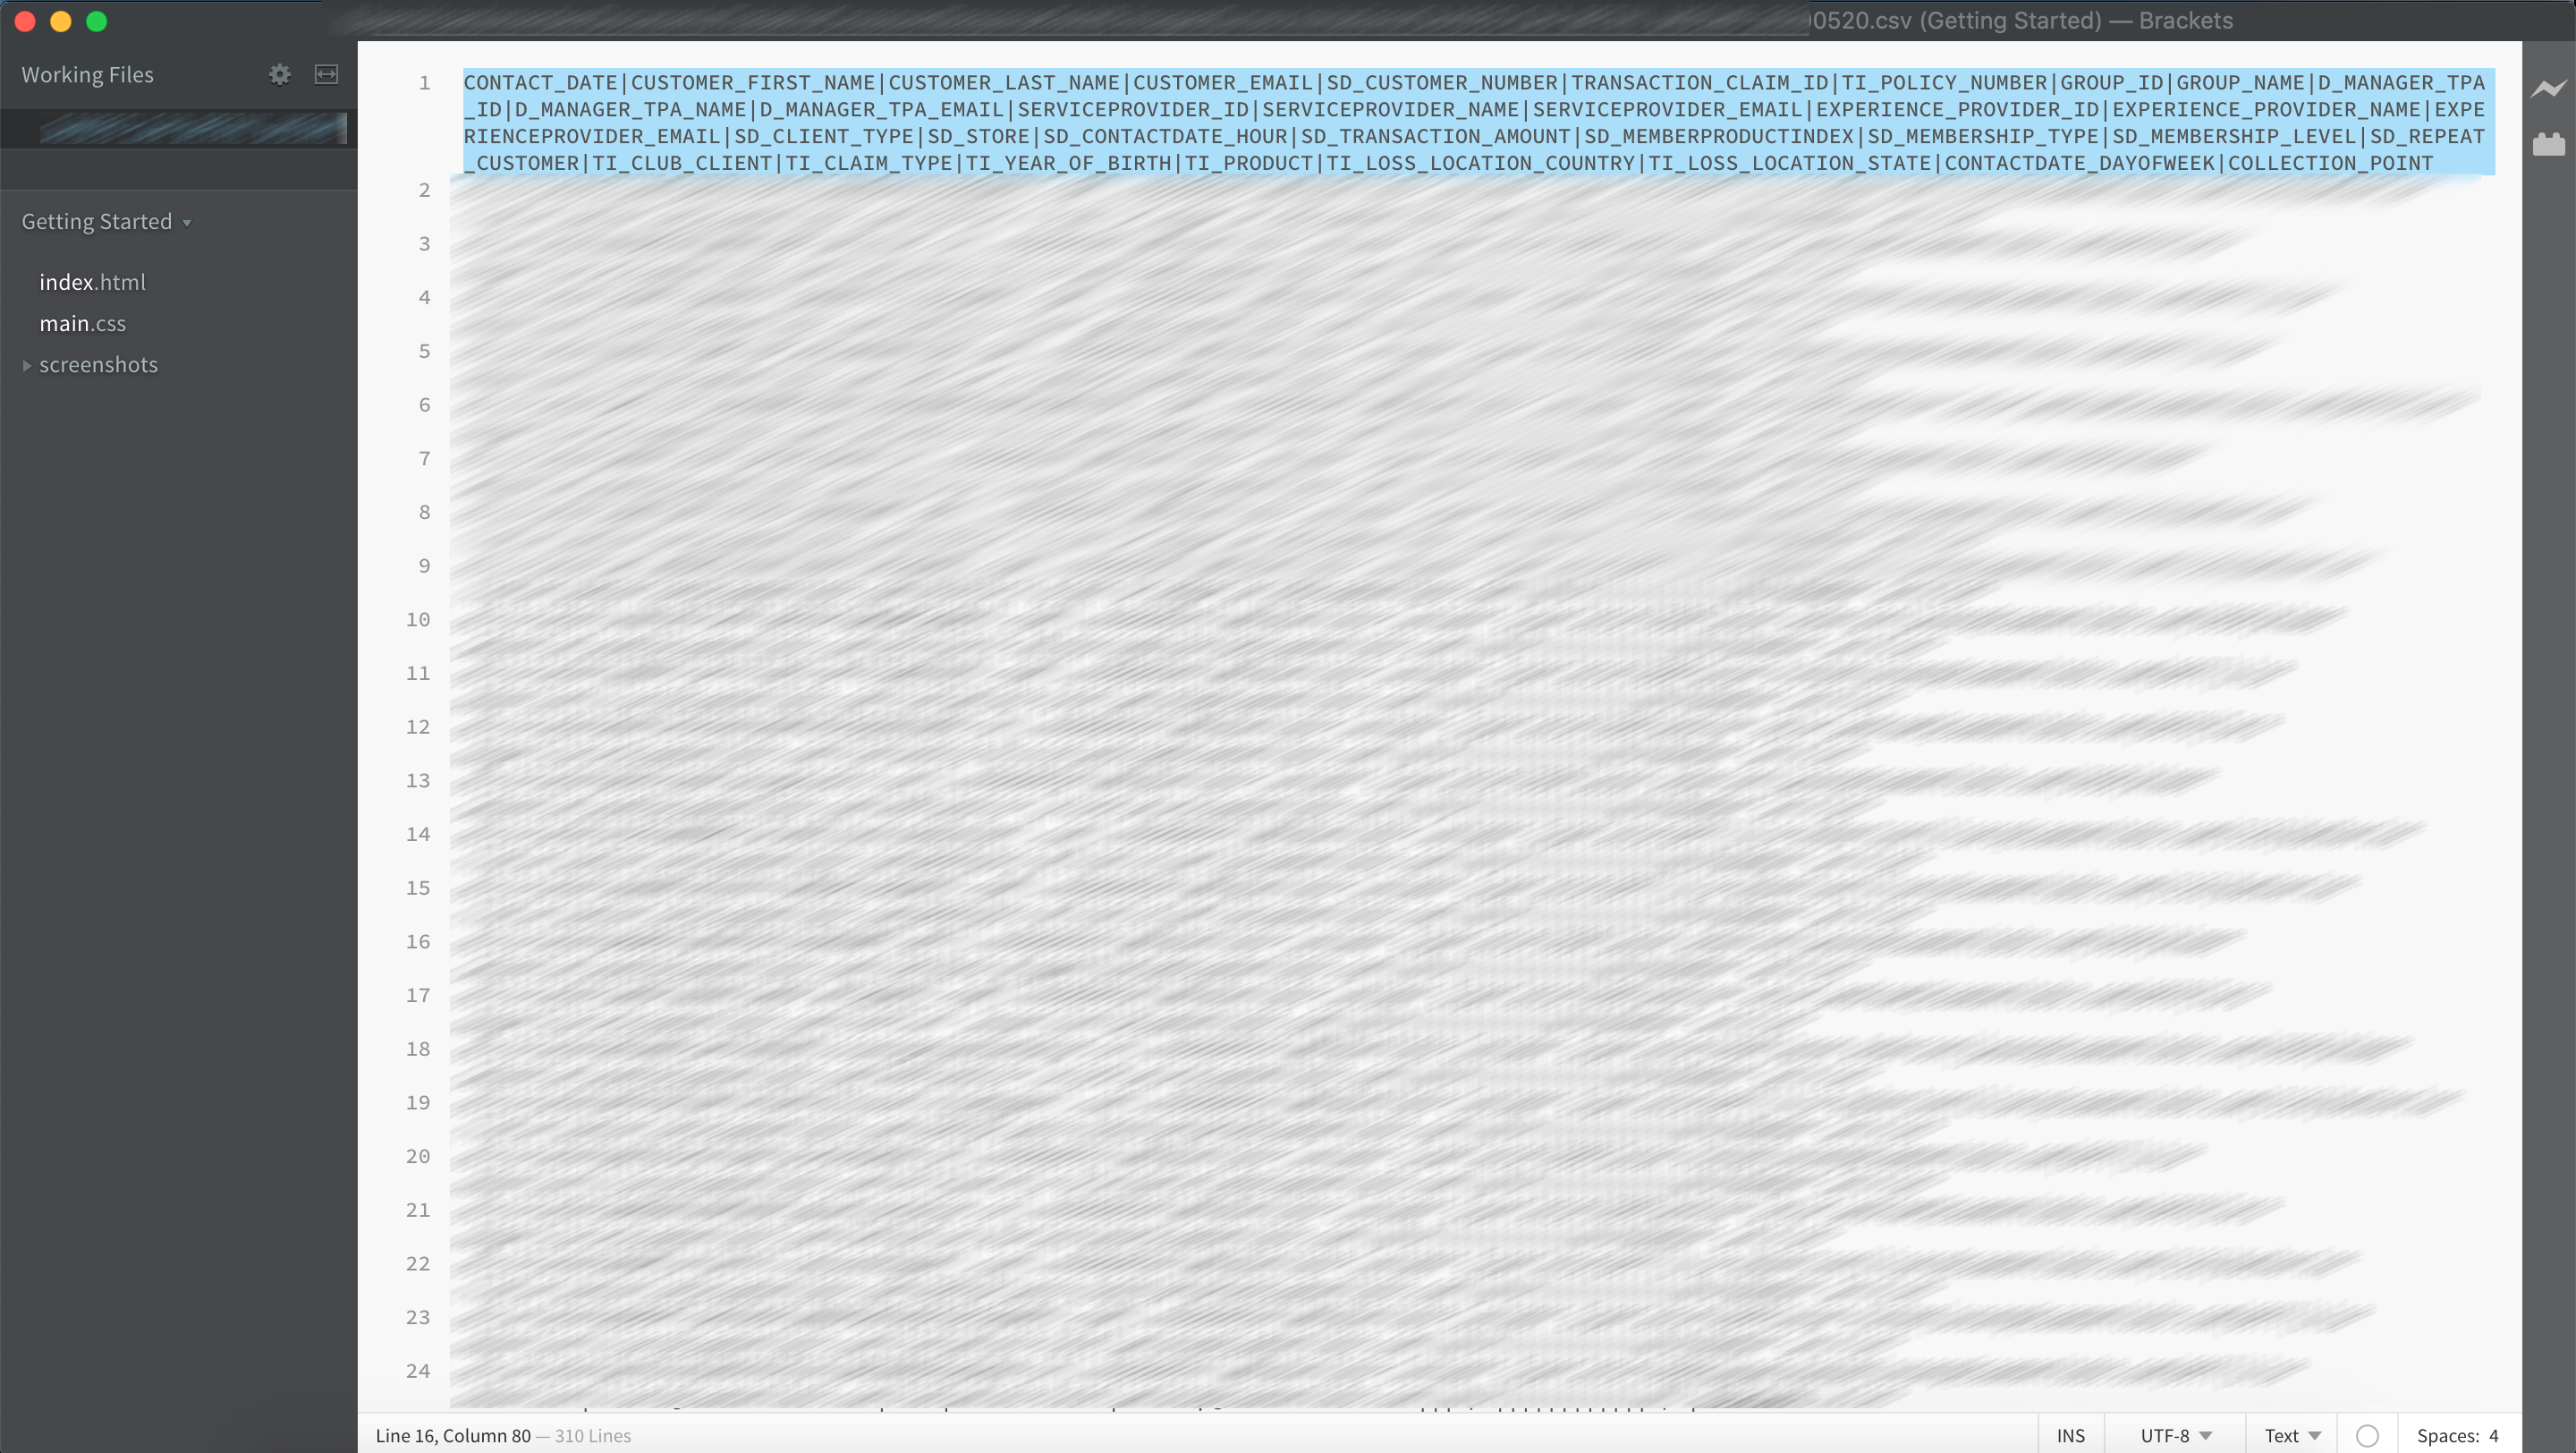
- Open the reference file.
- Copy the first line, that contains the header. If the text editor is configured to wrap lines, be sure you select all the lines that compose the header.
- Paste the reference header in a blank document with word wrap turned off.
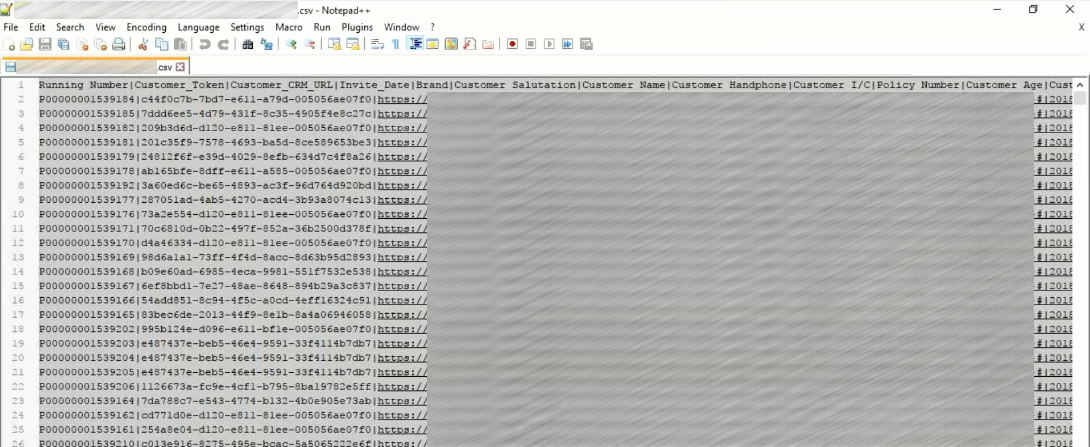
- Open the troubled file and copy its first line.
- Paste the header on the same document where the reference header was pasted.
- Check if there are any differences between the amount and the name of the columns between the two header lines. Check also if the separator being used is the same as in the reference file.


Fix Invalid Columns
In case there are columns missing, out of order, misspelled, or with any other issue, fix them so that they match the reference file.
Check the Number of Columns for each Row
Another common issue related to the file format is that some rows do not have the same number of columns as the header. Here is a way to check if the number of columns is the same for all rows.
- Open the troubled file with a text editor and copy all the content.
- Open a blank Excel sheet and paste the copied content.
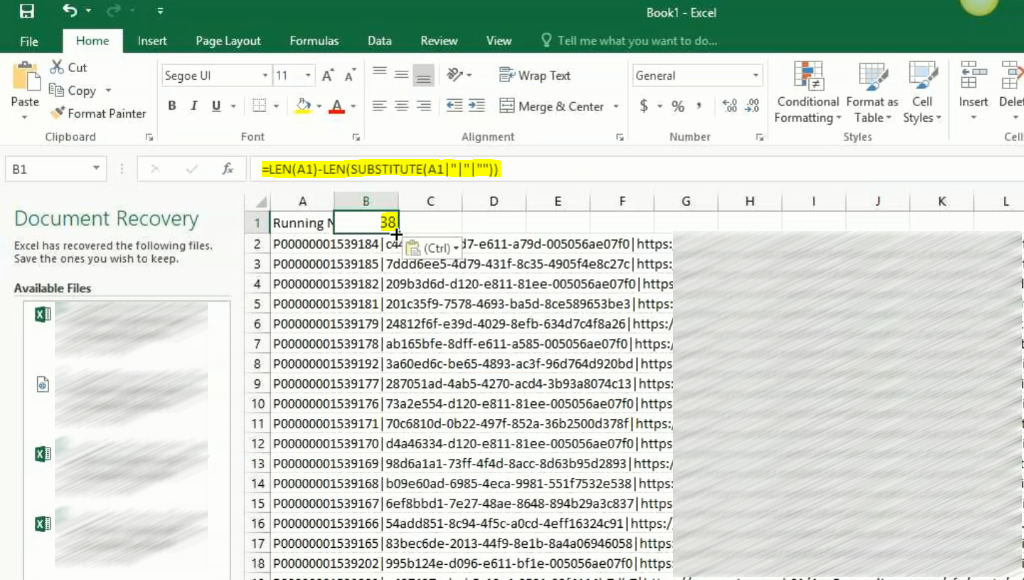
- Go to cell B1 and type the following formula:
=LEN(A1)-LEN(SUBSTITUTE(A1,"|","")). If the separator is not a pipe, replace it in the formula.
- Apply the formula to all rows.
- Select columns A and B and create a filter.
- For column B, select in the filter all rows that have a different column count than the header.
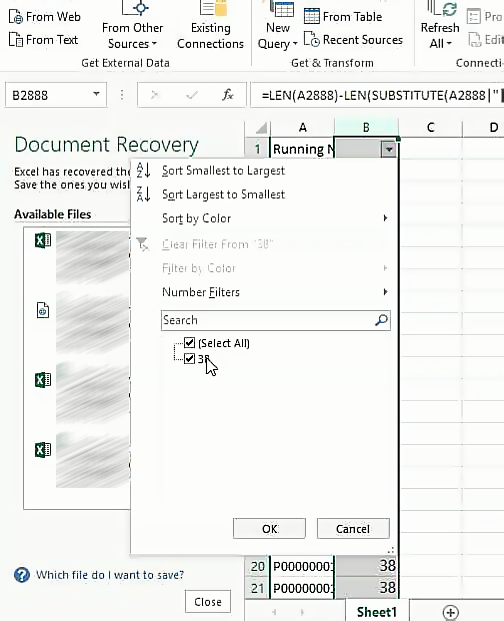
Records with an invalid number of columns
If there are any rows with more or fewer columns than the header, fix them accordingly. Here are some things that may be causing the difference:
- Multiple email addresses in the column dedicated to the email address: If these email addresses are separated by commas and the comma is also the column delimiter, it will be interpreted as more columns than expected. Put the column value in quotes.
- Misplaced line break: The line break will split the record in two and the row will have fewer columns than expected. An empty line can also be considered an invalid record. Look for empty lines especially at the end of the file. Remove any misplaced line breaks or empty records.
- Row enclosed in quotes: Quotes must be used only to wrap the content of a field when it contains the delimiter. For example, if the delimiter is a comma and the content is a text with a comma, it must be enclosed in quotes. If this is not the case, remove the quotes.
Check The Header And Content
All imported files must have a header and records. If the file has only the header or only the records, it will be rejected.
Missing header or content
If the header is missing, copy it from the reference file. Check that the records have fields in the same order.
If the content is missing, there is nothing to import. Check why the file has been generated in the first place.
Analyze The Disposition Report
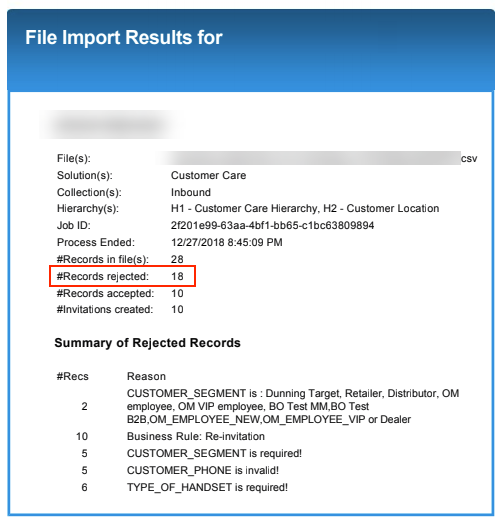
Once you are sure the rejected file has a valid format, you can start validating its content by analyzing the Disposition Report. It looks like this:
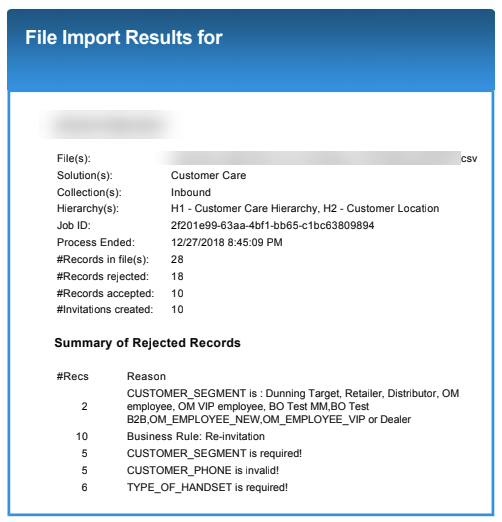
Let us take a look at what the report is telling us:
- File: File that has been imported. Make sure you are working with the correct file, especially if there are many of them.
- Solutions, collections, hierarchies, and job id: Just informative fields
- Process Ended: Date and time when the import process finished. Make sure you are not looking at an old report.
- #Records in file: How many invitations there were in the file.
- #Records rejected: How many invitations were considered invalid. If all invitations have been rejected, check if a mandatory column is not missing values.
- #Records accepted: How many invitations were valid.
- #Invitations created: How many invitations have been created. This will almost always match the number of records accepted.
Summary of rejected records
This section presents the reason why the records have been rejected. Keep in mind that each record can have more than one error, which would cause the sum of the records to be greater than the number of rejected records.
In this report:
- 2 records have a problem with the CUSTOMER_SEGMENT field. The values must match the ones on the list. In case everything seems correct, look for invalid characters, whitespace, or typos.
- 10 records violated the re-invitation rule.
- 5 records have the CUSTOMER_SEGMENT field with a blank value. Since the field is required, it must contain a value.
- 5 records have an invalid value in the CUSTOMER_PHONE number. This could be due to non-numeric characters, too long or too short phone numbers, whitespaces, dashes, etc.
- 6 records have the TYPE_OF_HANDSET field with a blank value and this is a required field.
So, from this report, it is possible to spot the errors and fix them. The easiest way of fixing these errors is by opening the CSV file in Excel (or any equivalent software) and search for the errors (e.g. search for empty cells on the required column). It is easier than using a text editor to do that.
Check the Required Fields
Some fields cannot be left without a value or the record will be rejected. If the rejected file has many records, the easiest way of checking if any of the required fields was left blank is this:
- Open the file in Excel or any similar software.
- Select all columns and create a filter.
- Mark which columns are required (make its header bold or set some background color).
- For each required column, open the filter and check if there is a "(Blanks)" option (or something similar to that). If you find it, select it, and it will show the records that do not have a value for that field.
Provide Required Values
With the rejected file opened in Excel or similar software, filter the rows with empty values for required fields. Then, provide a value for these fields.
Check the Provided Values
Values can be invalid for several reasons. The most common are:
- The value does not match the data type (e.g. a string is used on a numeric field).
- The value does not match the valid values (e.g. a number is expected to be between 0 and 100 and the provided value is out of this range).
- The value references something that does not exist (e.g. the survey the end customer is being invited to answer does not exist).
Fix Invalid Values
Make sure the values are valid, in the expected range, or reference an existing entity.
Check the Values Format
Values can be in a format that is different from the expected. Some examples are:
- Dates (e.g. a format like MM/DD/YYYY is expected and the format used is DD/MM/YYYY).
- Decimal numbers (e.g. A format like 0.00 is expected and the format used is 0,00).
Fix Value Formats
Fix the format to match what is in the reference file.
Check The Re-Invitation Rule
The re-invitation rule exists to prevent end customers from receiving too many surveys in a short period of time. The configuration varies from one customer to another, but it is usually more than 30 days. If another invitation is sent to the same end customer before the configured time elapses, the invitation will be rejected. Check if this is the case.
Remove The Re-invitation Records
Remove any invitations for end customers that have received other survey during the specified period.
Check Identity Fields
In some rare cases, there may be an identity field that is lower than the MaxID. This scenario must be investigated by a support agent.
<supportagent>
To determine if there is a table whose identity field is lower than the MaxID, refer to the article Fixing an Identity Field That Is Lower Than MaxID.
</supportagent>
Fix Identity Field
This fix must be performed by a support agent by following the steps in Fixing an Identity Field article.
Reimport The File
Once you made sure the format and the content of the file are correct, remove all the records that have been successfully imported, send the file again, and wait for it to be processed to check if the errors are gone. In case you cannot wait for the next processing window, raise a support ticket asking the file to be imported as soon as possible.
If after performing all the validations described in this article the file still gets rejected, please check if the disposition report indicates some other issue that is not listed here. If you still cannot fix it, please create a ticket to ResponseTek support to analyze what is preventing the file from being successfully processed. In the ticket, please include the following information to get a faster response:
- The last version of the file you are trying to import.
- The last disposition report.
<supportagent>
Additional Steps for Support Agents
If the customer states that they performed all the validations described in this article and the file is still being rejected, proceed with the following steps:
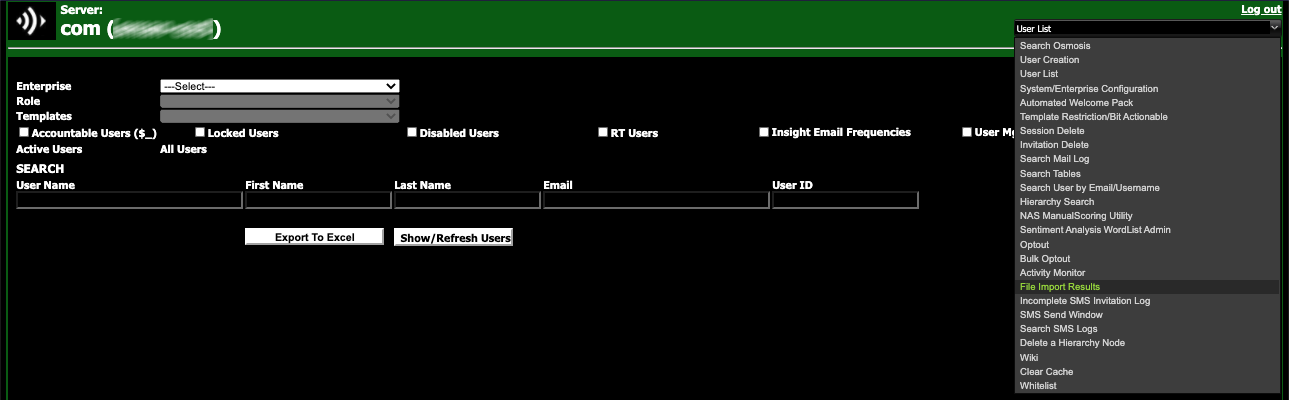
- Open the CSS Tool and go to File Import Results.
This screen will open:
- If the customer already specified the file, search for the file name using the browser search tool.
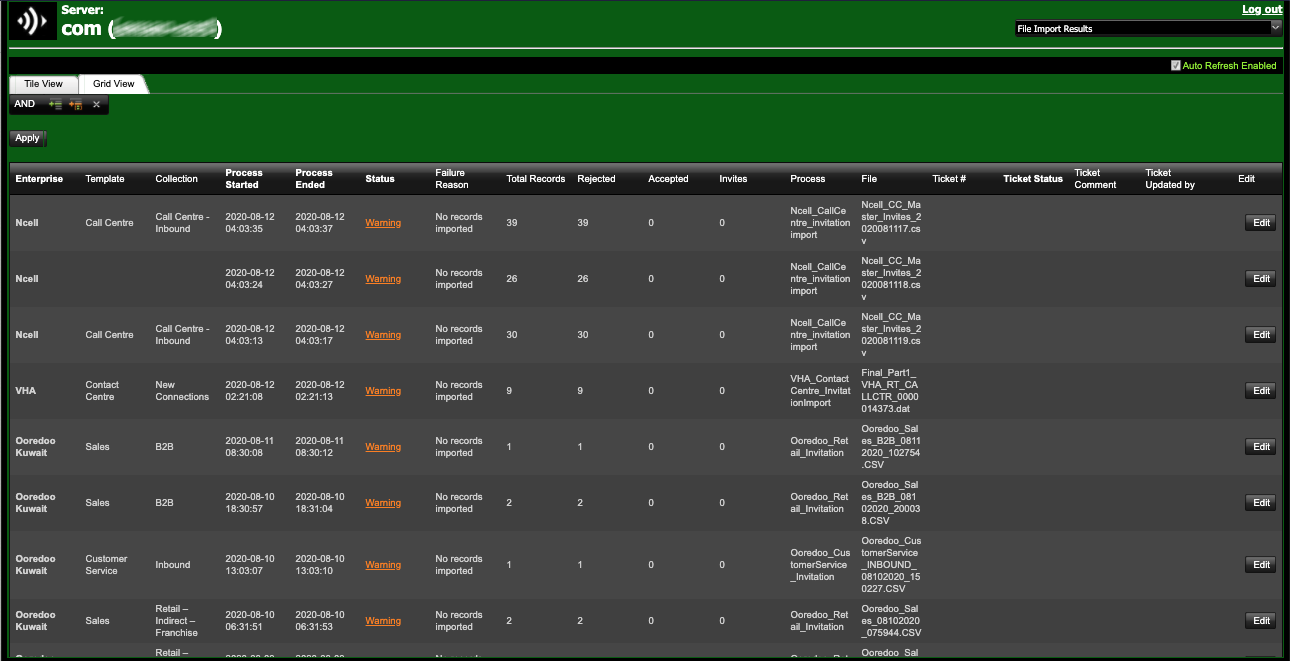
- If the customer has not informed the file name:
- Search for the customer's name on the first column, Enterprise.
- Check the Status column along with the Process Started and Process Ended columns. Search for a failed import in the period specified by the customer. If the customer has not specified the file name and the period, and there is no failed import in the last 24 hours, contact the customer and ask him for clarification.
- If you find failed imports, take note of the file name, in the File column.
- With the failed file name, open the customer SFTP folder.
- Search for the file inside the customer folder.
- Download it to your computer.
- Compare it with the file provided by the customer. If they are different, make sure you are looking at the correct file. If you cannot find the file sent by the customer in the SFTP folder, they may have edited it but never imported it again. Check with them to clarify before proceeding.
- To get the reasons why it failed, navigate to the following path inside the customer folder:
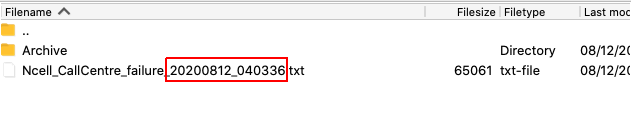
...\[Customer GUID]\Incoming\Invitations\[Template name]\Failure. - The last report will be in this folder and the older ones under the Archive folder.
- Search for a file with a timestamp in the name that matches the time in the Process Started and Process Ended columns.
- Download the file to your computer. Compare the report with the one provided by the customer. If it is different, make sure you downloaded the correct file.
- Open it and analyze what reasons for rejection are there. If they are mentioned in the public part of this article, return the ticket to the customer specifying what is causing the error and asking them to fix it using the provided instructions. It is always up to the customer to fix the errors on the file and provide a newer version, so be as clear as possible about what they need to do. You can even send a short video explaining the issue and how to fix it. In case the customer is not looking at the latest report (compare the report you got from the SFTP with the one sent by the customer), tell them and include it for them to check.
If the reason is something that the customer could have detected and fixed and that is not covered in the public article, nominate the ticket for KB improvement.

If you cannot determine what is causing the import failure, escalate the ticket to L2. They can look at the configuration files that execute the validation and check if there is any inconsistency in the validation mechanism.
Reprocessing a Failed Invitation File
Before reprocessing a failed import file, pay attention to the following points:
- Check the re-invitation rule. If the threshold is less than five days, do not reprocess the file and report this to the customer, since reprocessing it will create unwanted duplicate invitations. IVR invitations do not have re-invitation rules as they are not expected to be reimported.
- If the import failed not because the file was invalid but because of a failure in the system, do not try to reimport the file as a way to check if the system is now properly working.
- Make sure the customer understood the rejection reason before they provide a new file or ask to reimport an existing one.
- If the file has been partially processed, with some invitations imported and others not, it is up to the customer to remove the imported ones so that they are not rejected because of the re-invitation rule.
Please find the instructions to import a file in the articles below:
- Manual File Import for Hierarchy and Invitations
- Processing an Invitation/Hierarchy File Using Survey Manager
Follow up
When there is a rejection of an invitation file, there will be a subsequent file import request. We must help our customers to fix the issues so that they can have a successful import as soon as possible. So, always be patient and help them understand the errors.
</supportagent>
Priyanka Bhotika
Comments