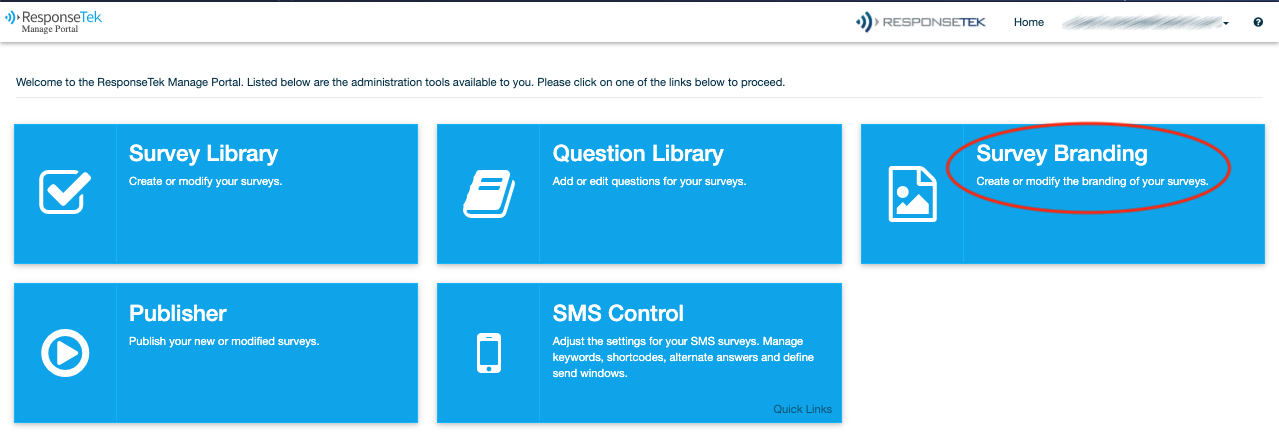
Overview
Branding is a way of customizing web surveys so that they are presented with the company logo and colors. It is possible to configure the branding by creating themes that can be reused among surveys. This is an effective way of keeping consistency among surveys. This article describes how to configure survey branding.
Information
The way branding is configured depends on the type of survey. To know the type of survey you are working with, follow these steps:
- Log in to the Survey Manager.
- Open the Survey Library.
- Find the survey you want to configure the branding to.
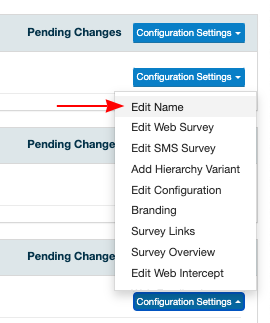
- Click on Configuration Settings and then Edit Name:
- Check the Collector Type field. There are two possible values for it:
- 11 - Standard
- 12 - Advanced
- Take note of this type since it will be important to follow the other instructions. From now on, this article will mention standard surveys or advanced surveys as a reference to the type of survey.
Please check below how to work with branding for the two types of survey:
Branding for advanced surveys
Advanced surveys have theme creation and usage as two integrated tasks, unlike standard surveys.
There are two possible ways to start configuring branding for advanced surveys:
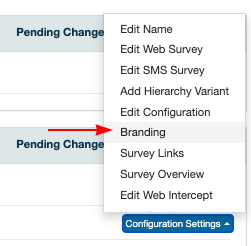
- From the survey library:
- Find the survey in the survey library.
- Click Configuration Settings and then Branding.
- When editing a web survey:
- Click Branding on the top of the page.
- Click Branding on the top of the page.

This screen will open:

This section describes how to use this screen to:
Configuring Themes for Advanced Surveys
This is how you create a new them or edit an existing one:
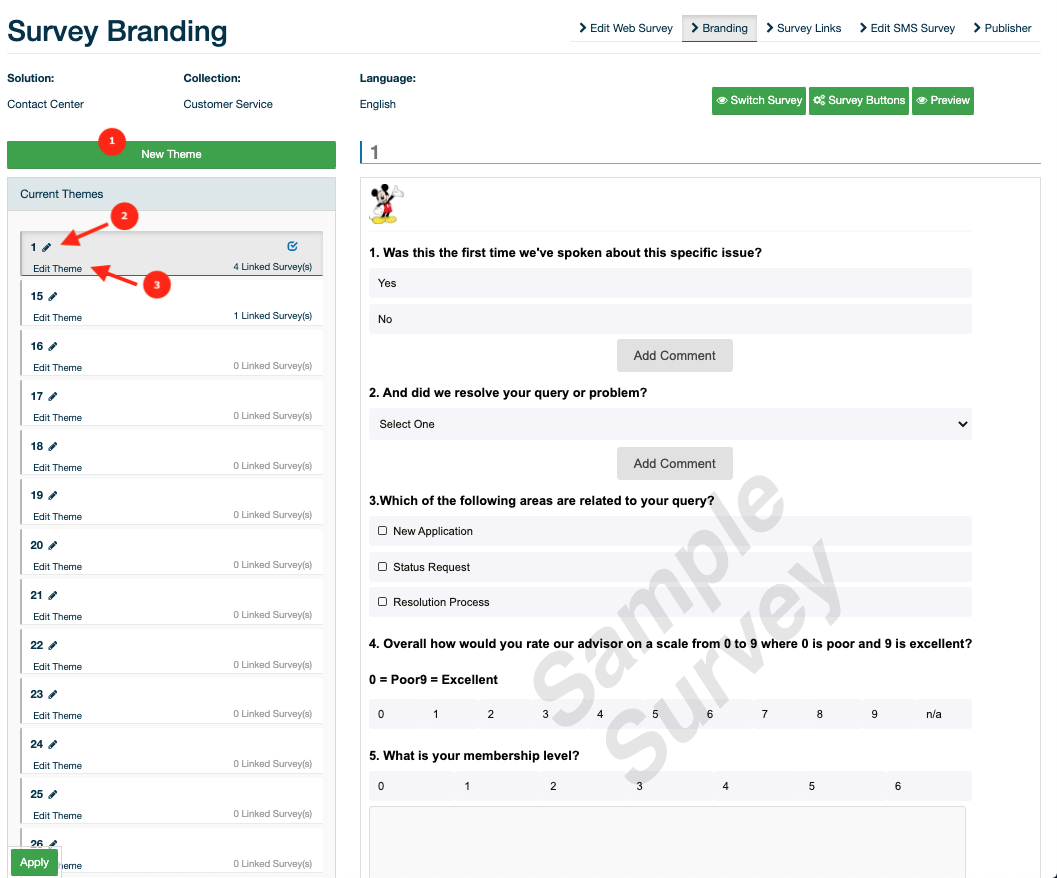
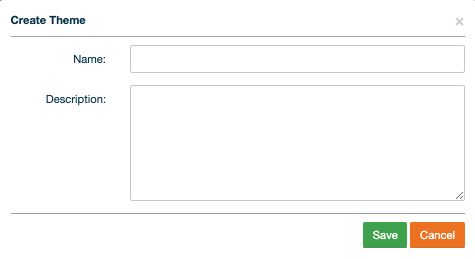
(1) Create a new theme. In this case, you will be prompted for the theme's name and description:
After saving, locate the new theme by its name and edit it (3).
(2) Edit the name of an existing theme.
(3) Edit the theme configuration.
When you edit a theme, the pane shows the configuration groups. Unlike standard surveys, the same configuration applies for both desktop and mobile browsers:
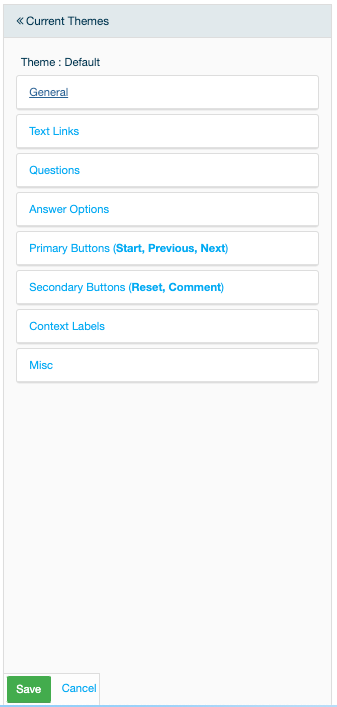
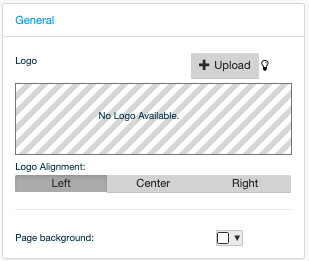
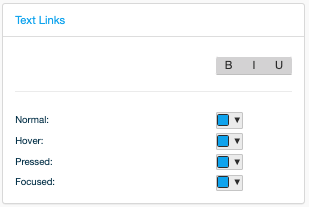
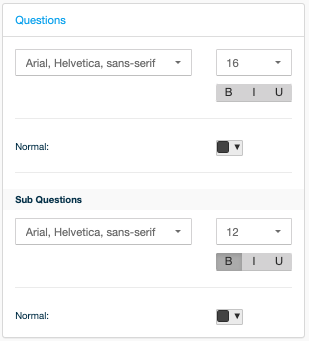
These are the configurations available in each group:
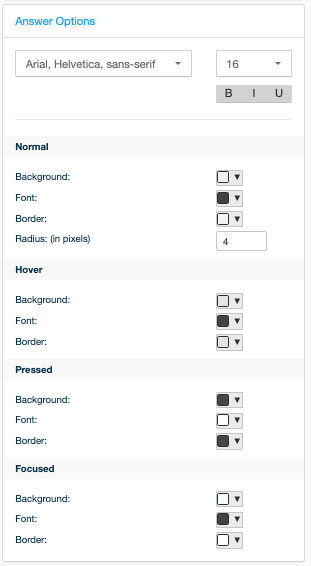
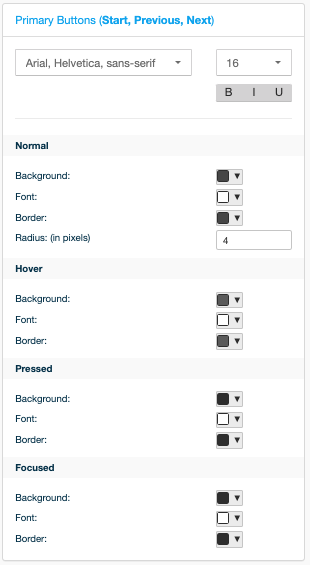
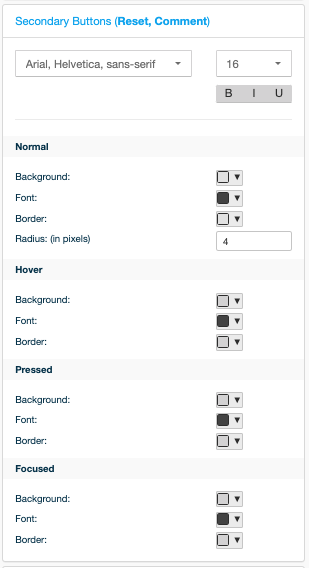
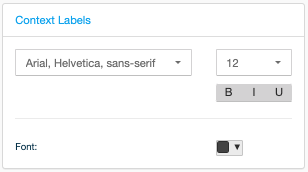
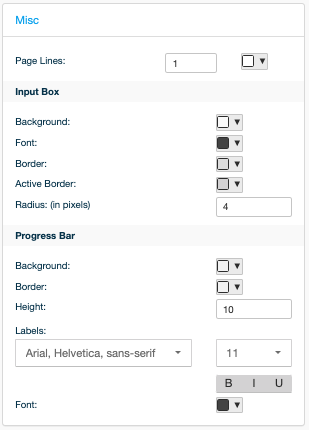
After making all the configurations, click Save.
Applying a Theme to an Advanced Survey
Once a theme is created, it can be applied to multiple surveys. Check below how to do that.
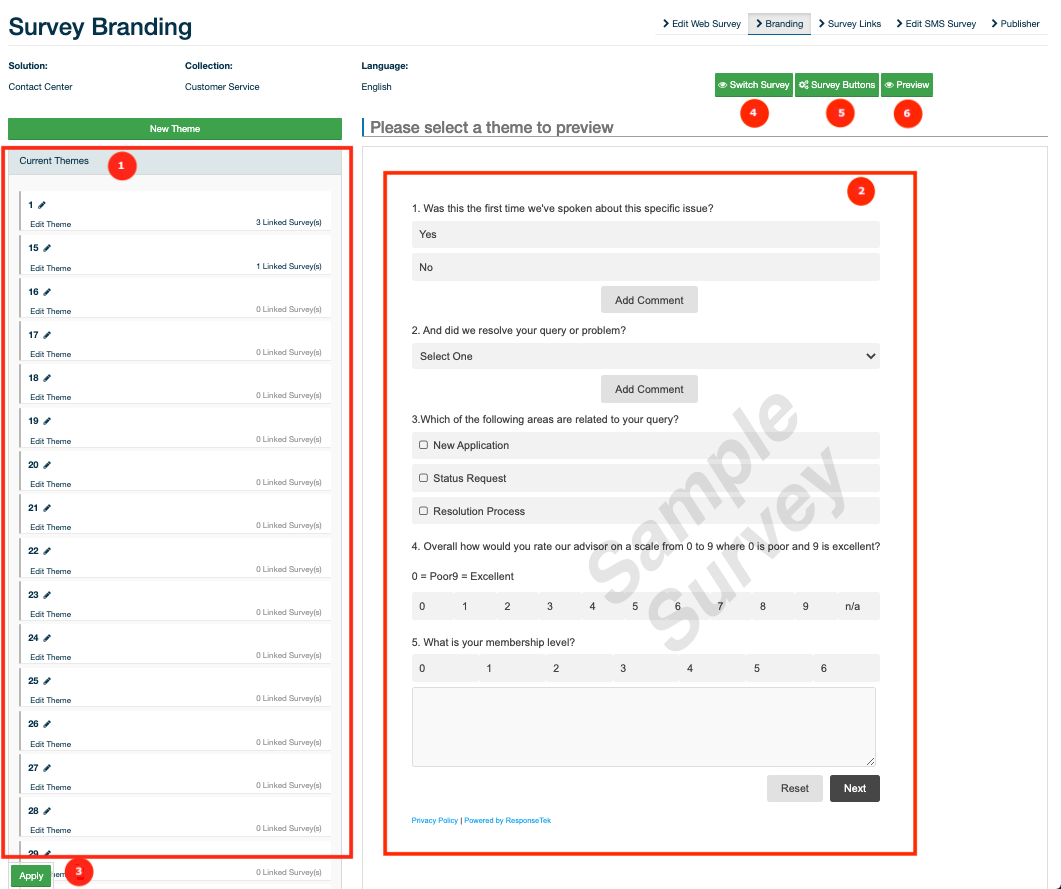
(1) Select an existing theme.
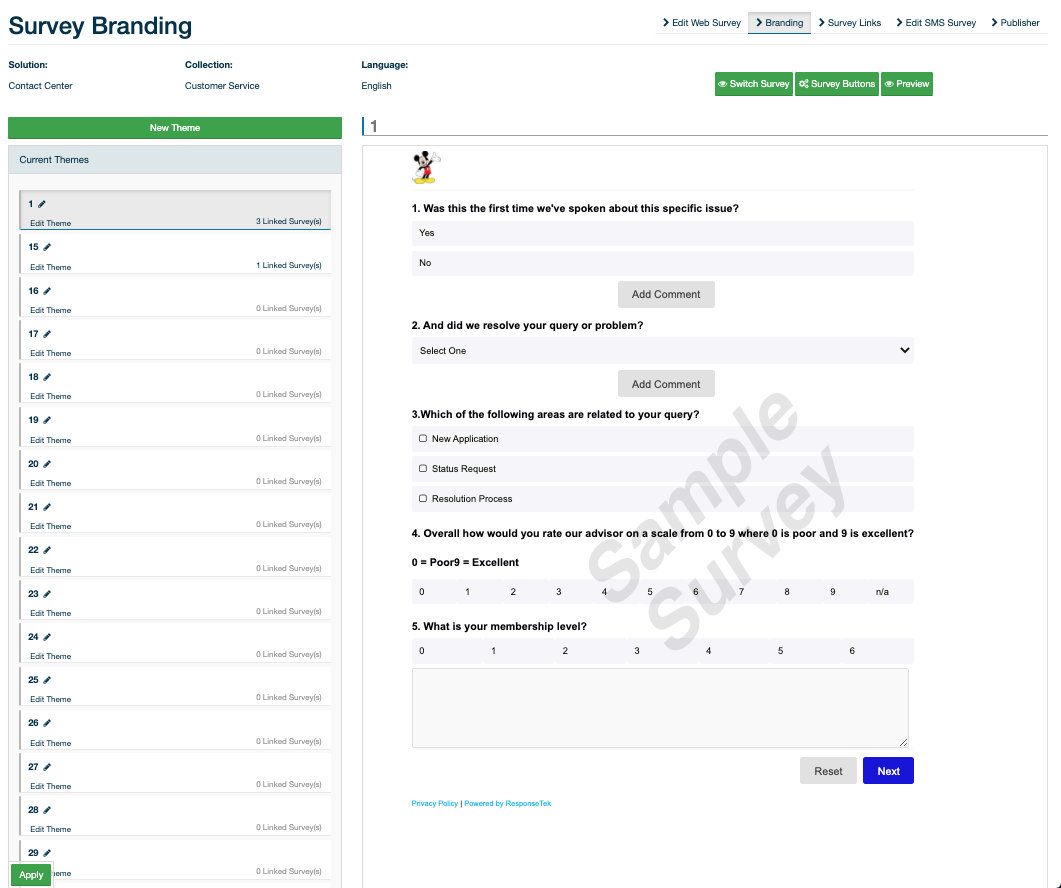
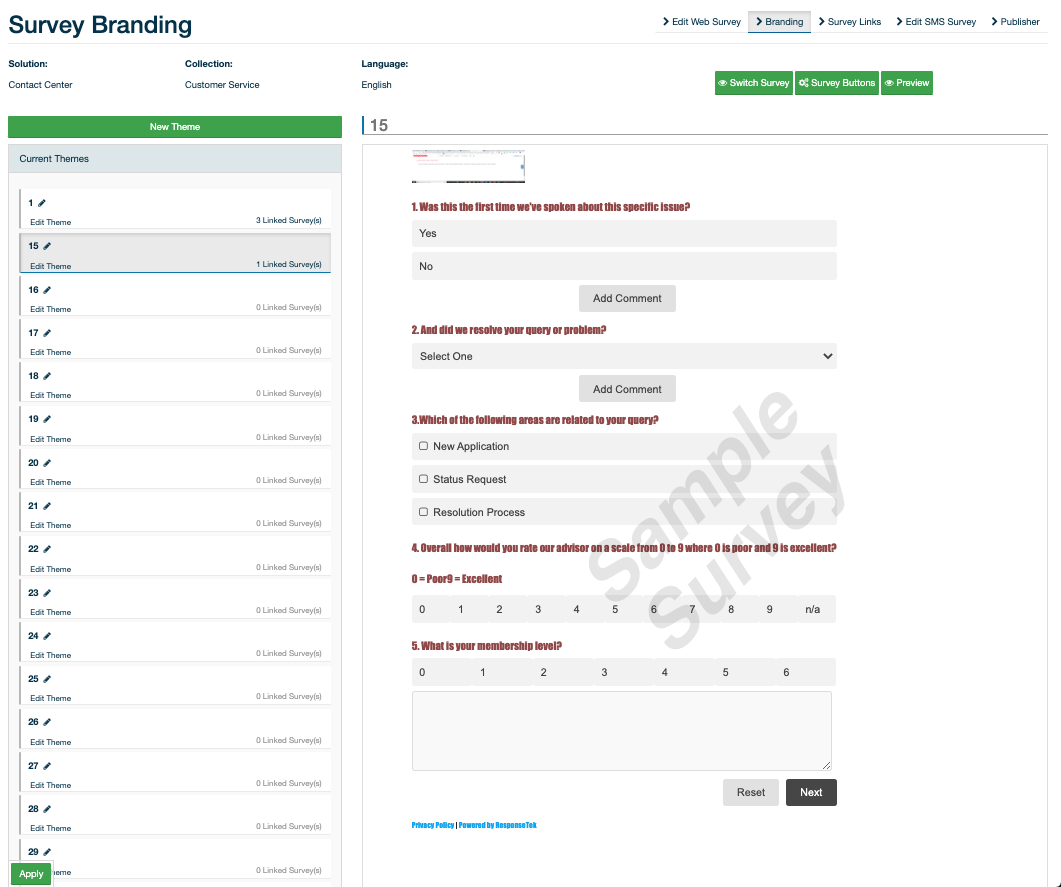
(2) Preview the theme. The preview uses a generic sample survey, not the questions you have configured for this survey. It shows how the different controls will look like. For example:
 |
 |
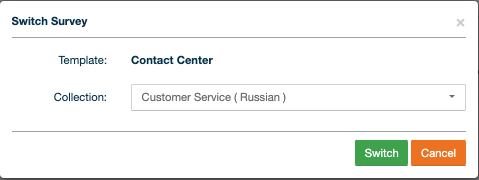
(3) Apply the chosen theme.
(4) Switch to another language or to another survey from the same solution.
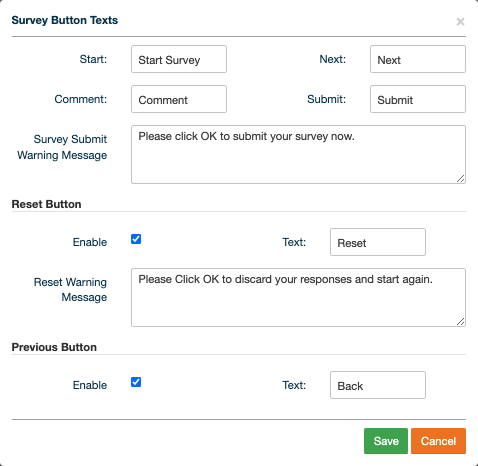
(5) Configure the buttons used on the survey.
(6) Preview the survey with the chosen theme and configurations. You must first apply the changes (3) in order to be able to preview them.
Branding for standard surveys
When working with standard surveys, creating themes and applying them to a survey are two tasks that are not as integrated as they are for advanced surveys. This section outlines how to:
Configuring Themes for Standard Surveys
These are the steps to configure a theme:
- Log in to the Survey Manager.
- Click on Survey Branding.
- If you want to create a new theme, check the Create a new theme option.
- However, if you want to edit an existing theme, check the Edit theme option and select the theme to be edited.
- Select the language of the theme that will be created or edited. Buttons and other texts must be on the selected language.
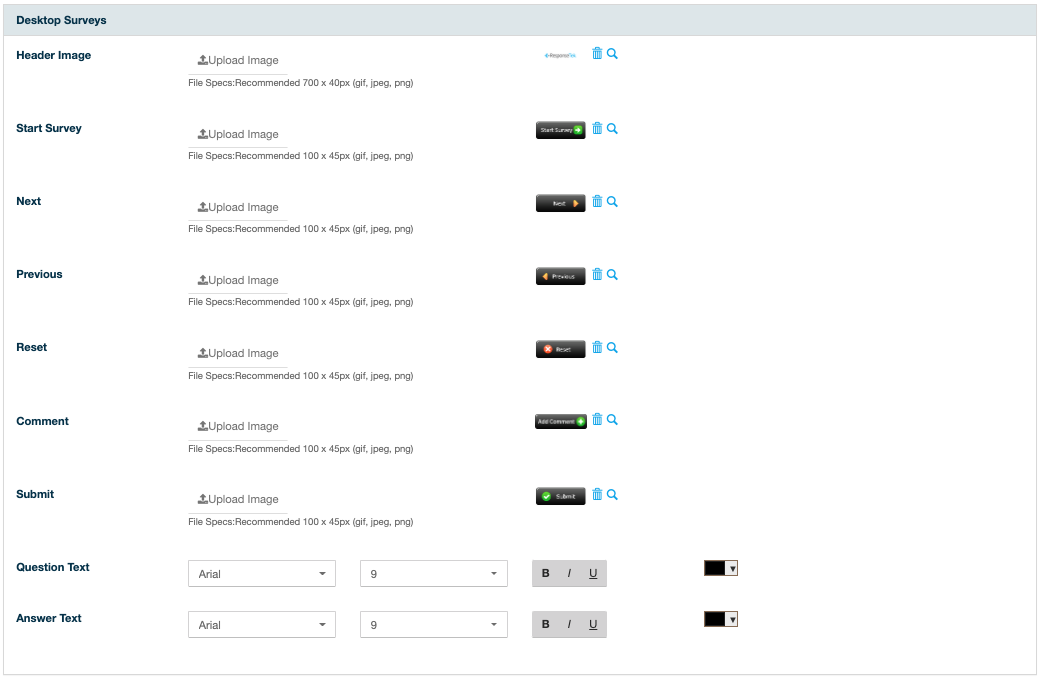
- The first configuration group is Desktop Surveys. The configurations here are used for web surveys viewed in a desktop browser. Since there is more space because of a bigger screen, choose items that will look good at these screen sizes.
- Header image: the company logo that will be at the top of the page.
- Start survey: an image to be used as the button used to start answering the survey.
- Next: an image to be used as the button to move to the next page.
- Previous: an image to be used as the button to move to the previous page.
- Reset: an image to be used as the button to discard all answers and start over.
- Comment: an image to be used as the button to add comments to a question.
- Submit: an image to be used as the button to record the answers and finish the survey.
- Question text: the font style used for the questions.
- Answer text: the font style used for the answers.
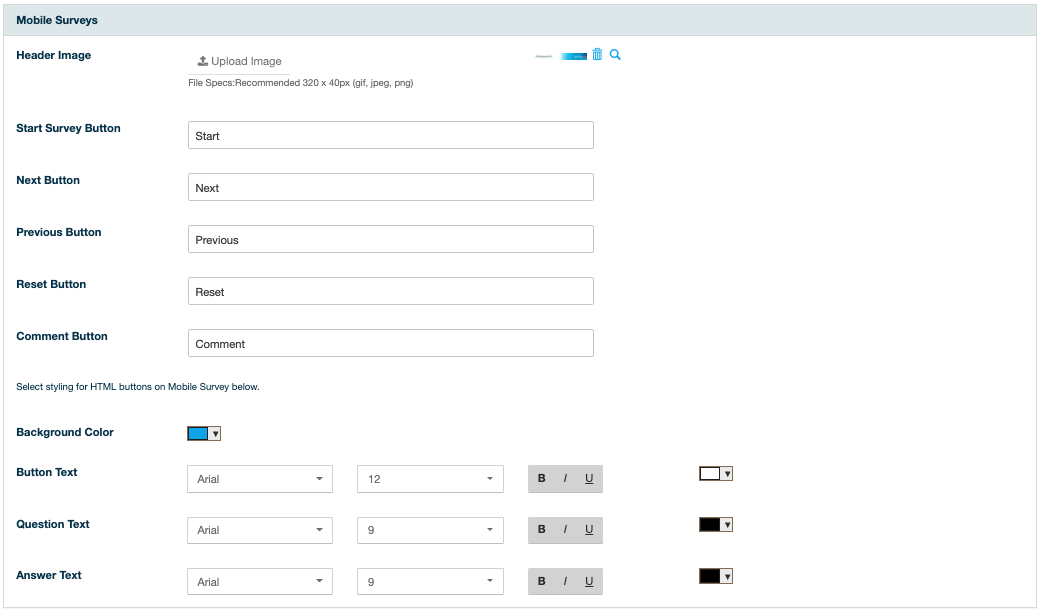
- The second configuration group is Mobile Surveys. The configurations here are used for web surveys viewed in a mobile browser. Since there is less space because of a smaller screen, choose items that will fit the screen properly.
- Header image: the company logo that will be at the top of the page.
- Start survey button: the text of the button used to start answering the survey.
- Next button: the text of the button to move to the next page.
- Previous button: the text of the button to move to the previous page.
- Reset button: the text of the button to discard all answers and start over.
- Comment button: the text of the button to add comments to a question.
- Background color: the background color of the buttons.
- Button text: the font style for the buttons.
- Question text: the font style used for the questions.
- Answer text: the font style used for the answers.
- Click Save.


Applying a Theme to a Standard Survey
Applying a theme to a survey is a task accomplished along with the survey configuration. There are two possible ways to do that:
- From the survey library:
- Find the survey in the survey library.
- Click Configuration Settings and then Branding.
- When editing a web survey:
- Click Branding on the top of the page.
- Click Branding on the top of the page.
When the screen opens, you will see this screen:
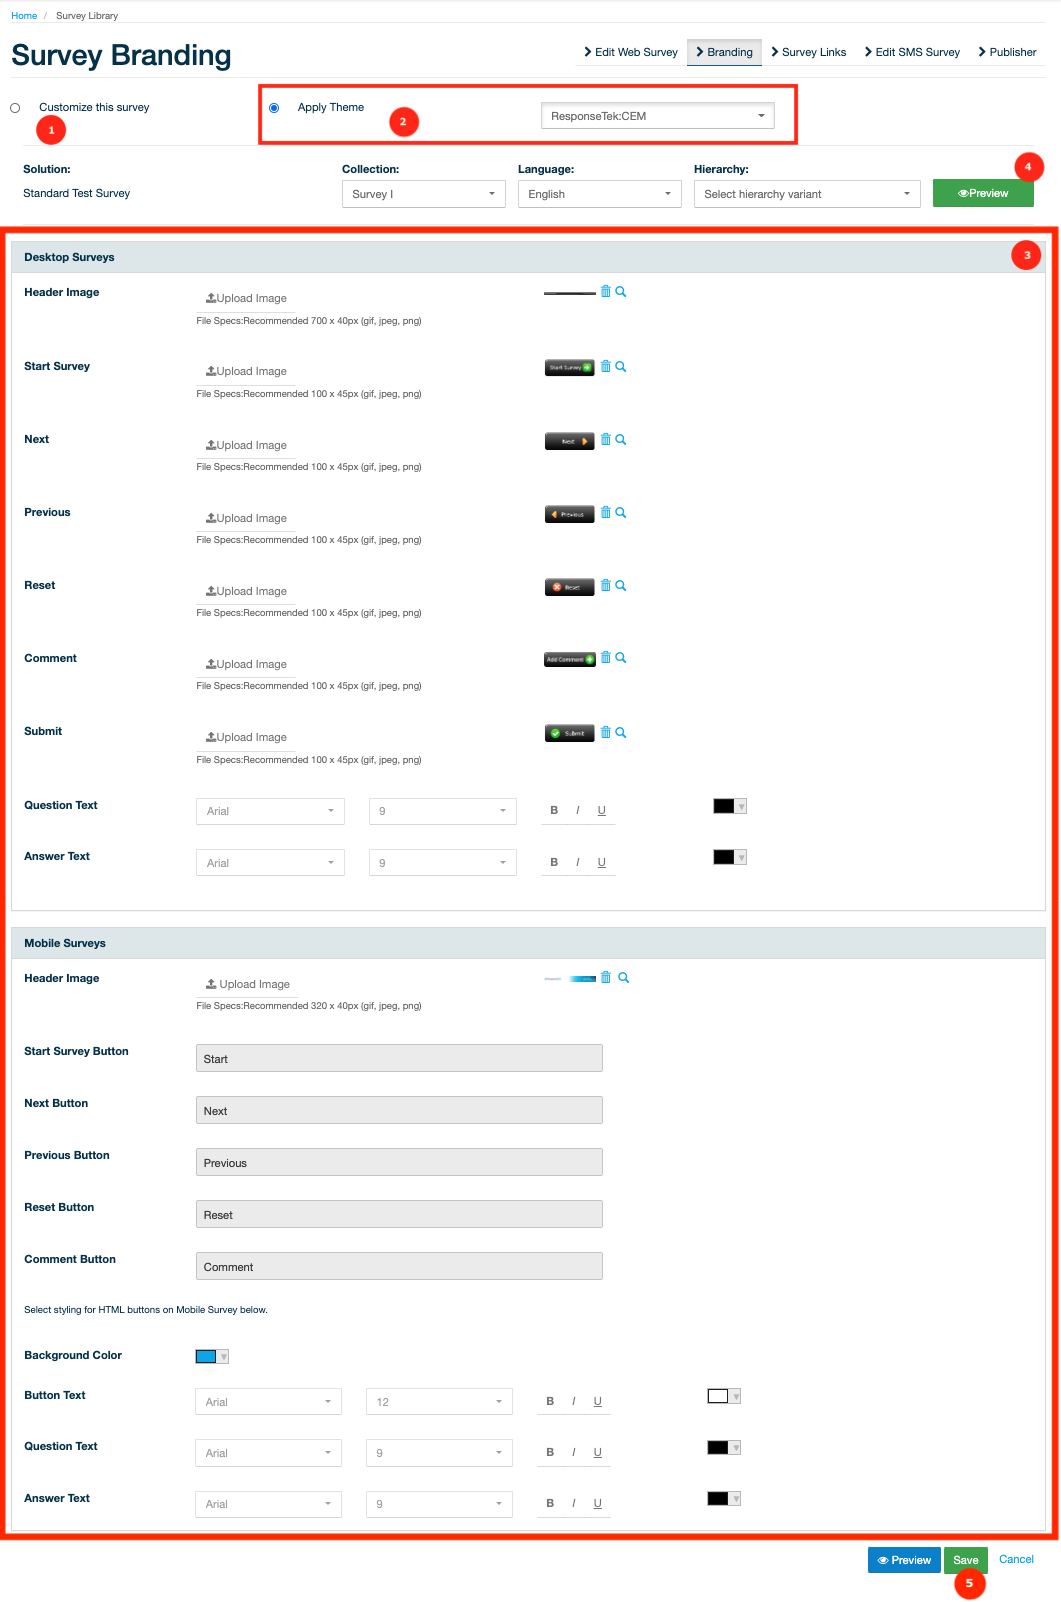
Here is what you need to do:
(1) Customize the survey: instead of using an existing theme, this will let you configure branding exclusively for this survey. The configuration works the same way as creating a new theme (see Configuring themes for standard surveys, steps 6 and 7).
(2) Apply theme: this option will let you select the theme you want to use with this survey.
(3) Use this area to either configure the survey or review the theme you have chosen.
(4) Preview the survey with the configured branding.
(5) Save the survey.
Priyanka Bhotika
Comments